One of the most frequent questions I’m asked about being a medical illustrator, is how I create my artwork. Most people I talk to assume everything I do is digital, completely rendered on the computer. They are often surprised to hear that 99% of my illustrations begin as a pencil and paper sketch. Here is a short explanation of how I create a full-color illustration.
I begin everything with pencil and paper. I really like Graphing & Design Vellum by Clearprint for my sketches. Though I also use Bienfang’s Rag Translucent Marker Paper sometimes also. Both of these papers take pencil lines really nicely and also (very importantly) erase well. I use a mechanical pencil which holds a .3mm lead. From here, I gather my reference materials and begin to sketch.
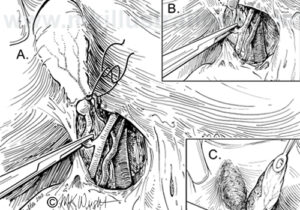
I usually complete a very rough sketch first, which I then finalize into a final sketch. In the rough sketch I will work out my proportions and get the general shapes down on the paper. I continue to refine the sketch into the final sketch, this step usually taking much longer.
My final sketch should be detailed enough that it could stand on it’s own as a final piece; however, I take the final sketch into the computer at this point to add the color. After scanning my sketch in, I open it up in Adobe Photoshop and begin by colorizing my sketch lines and cutting masks. From here, I lay in local color and then begin adding shadows, highlights and finally the small details that make the illustration really pop. This process can be fairly quick for a simple color illustration but could take up to several days for a more complex illustration.
The above series of images are captured from an illustration of the mid-sagittal section of the brain, beginning from rough sketch all the way to the final full-color illustration.


